We have already discussed the PHP native mail() method and PHP mailer packages in a previous article. First, we covered the mail() method features - such as sending rich HTML email templates with attachments. They were satisfactory on their own.
Additionally, we looked at two of the most frequently used packages, PEAR Mail package and PHP Mailer. We went through the installation steps and saw the value added by their use.
This includes, but is not limited to:
- The choice of configuring external SMTP directly from the code
- Easier handling of header fields and attachments
- Cleaner syntax and
- Built-in security features
Although these PHP mailer packages may be used for transactional emails as well as bulk sending for email lists, email cloud-based APIs are considered better solutions. There are several reasons for behind this. The most important one is that cloud hosts often prevent sending emails to preserve domain reputation. If you don't follow every requirement your emails may not be sent. The use of email APIs raises sending reliability and API providers also offer services that improve delivery rates.
Another reason is that when mass emails - eg. hundreds of thousands - are sent, you'll probably want to know statistics and also want smart tools to manage unsubscribes and email lists based on recipient behavior. They also help to simplify the required PHP mailing scripts, which is also a benefit from a developer's point of view.
Within this article, I'll show you three of the most popular choices for bulk email sending using PHP code. You'll see how to set these services up and you'll learn about some useful things such as a step-by-step description of how to include an image attachment with PHP script or how to create a reusable email template.
Sending HTML Email Templates Using Mailgun
Mailgun is a wonderful email API for sending transactional emails. As an email API should, they put a big emphasis on deliverability and domain reputation. You can set up multiple domains with isolated reputation, DKIM or SPF email sender validation, which is all key when it comes to managing reliable email sending.
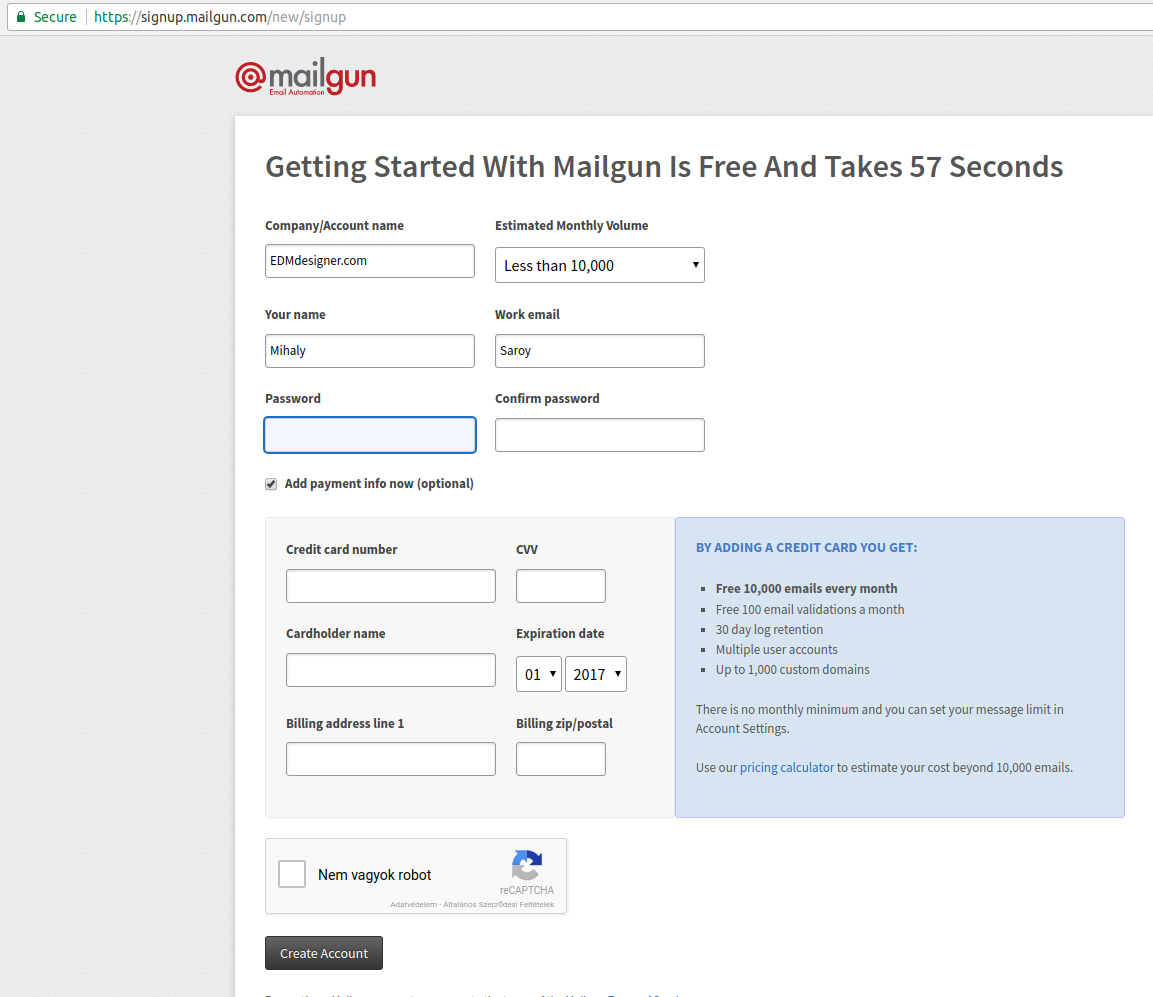
To gain access to their API, first, you need to sign up on their webpage to get an Access Key. The key will enable the use of the API services. By first, you need to provide your contact details and information about your estimated email sending volume:
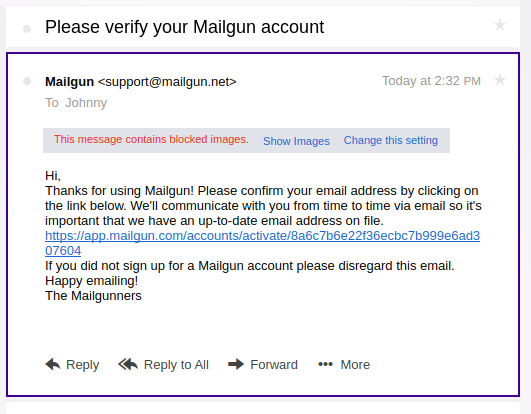
Then an opt-in account verification email will be delivered to your inbox.
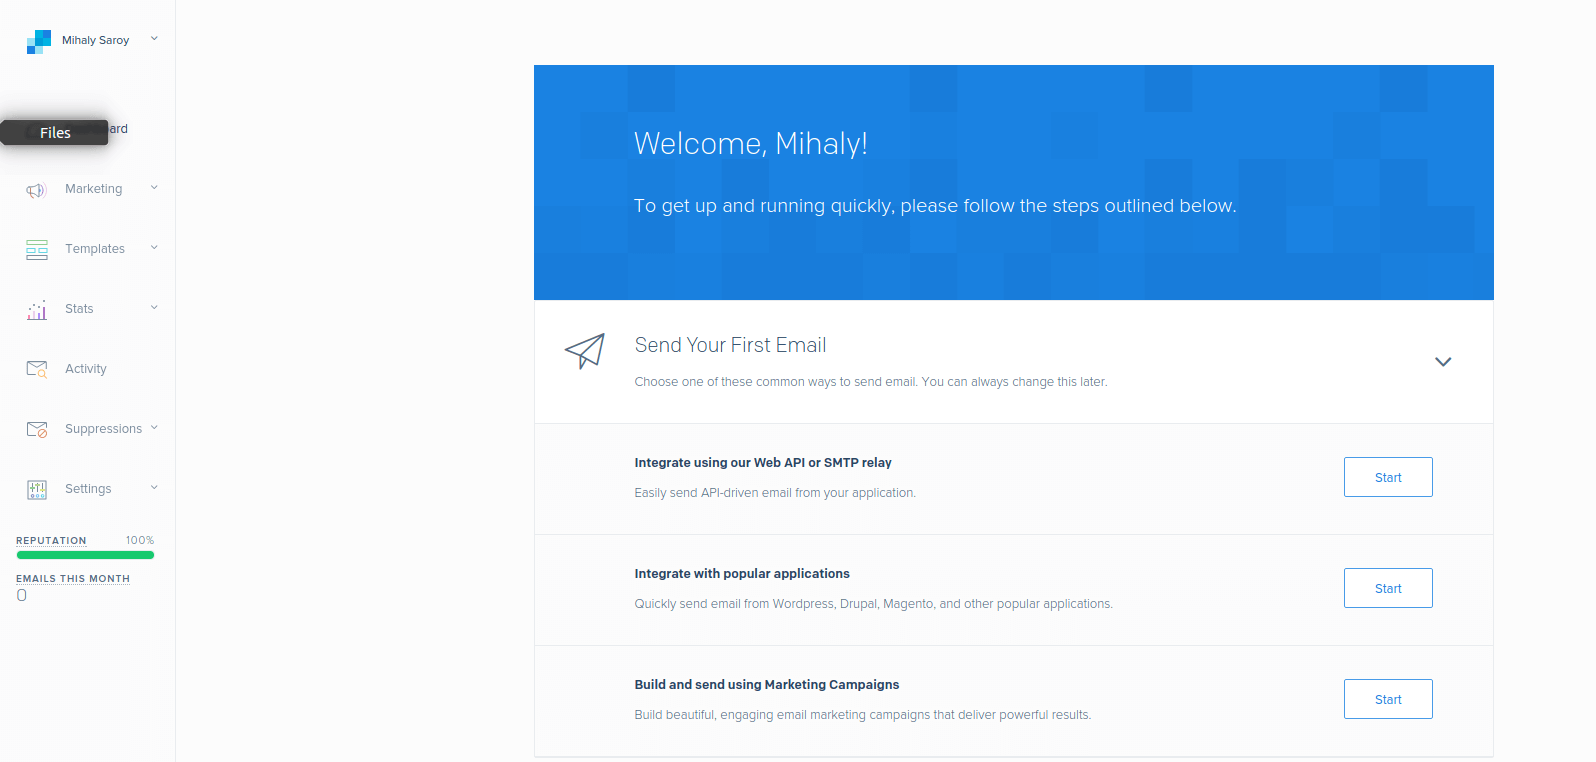
After confirmation, you'll be faced with a quick setup guide:

You can choose the desired programming language and get started immediately. Moving on, I'll walk you through the PHP code implementation. Setting up a PHP wrapper script for Mailgun is really straightforward.
The steps are the following:
- Include the vendor/autoloader.php script (when using Composer)
- Instantiate the client
- Make the call to the client
Other third-party services follow the same logic so you better store this piece of information really well.
Building PHP projects become much easier using the Composer dependency manager. If you are new to using Composer, read about the installation details and the background about it. It'll make PHP email sending much easier.
For now, we just go through with the necessary steps to have Mailgun ready for use with PHP:
    1. Run in the terminal: $ composer init

    2. Answer the setup wizard questions:

        example 1: Would you like to define your
                dependencies (require) interactively [yes]? no
        example 2: Do you confirm generation [yes]? yes

    3. Add these to the generated 'composer.json' file:

        "require": {
            "mailgun/mailgun-php": "^2.4",
            "php-http/curl-client": "^1.7",
            "guzzlehttp/psr7": "^1.4"
        }

    4. Run in the terminal: $ composer install
Do you remember the 3-step list from the beginning of the section? Good, because that's what we'll continue with:
         <?php

            # Include the Autoloader

            require 'vendor/autoload.php';
            use Mailgun\Mailgun;

            # Instantiate the client.

            $mgClient = new Mailgun('key-7e55d003b6608b22...943f79accd31a');
            $domain = "sandbox21a78f824a064bc58...13eb160ebc79.mailgun.org";

            # Make the call to the client.

            $result = $mgClient->sendMessage($domain,
                    array('from'    => 'Developer <developer@edmdesigner.com>',
                            'to'      => 'Friendly User <user@yourcompany.com>',
                            'subject' => 'Hello Friendly User',
                            'text'    => 'Testing some Mailgun awesomeness with PHP!'));
        ?>
If you use the script in a web application, you should store the Mailgun API key and other sensitive data in environment variables.
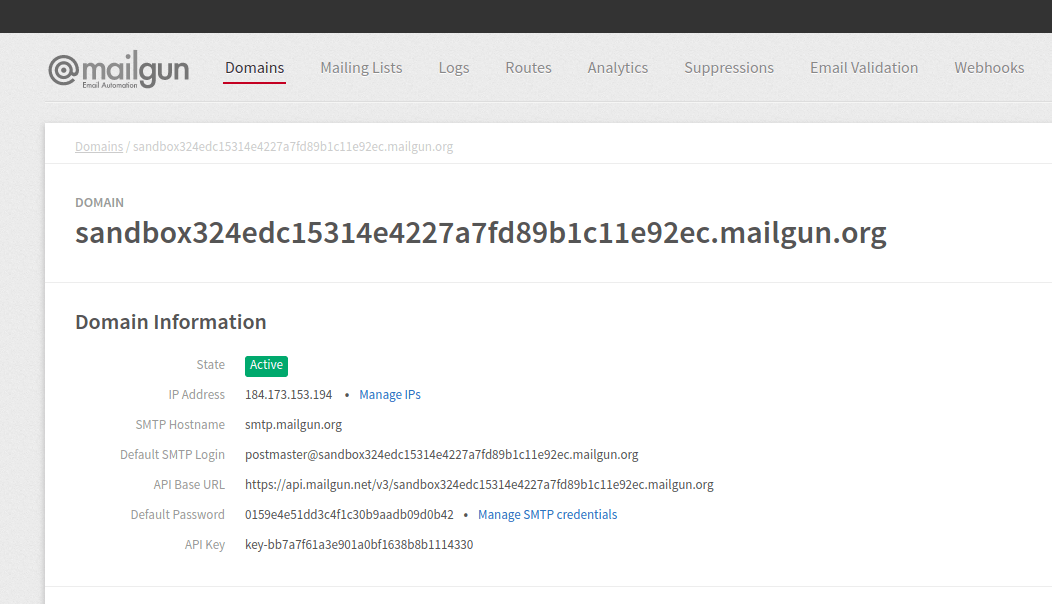
The only thing you might not know already is where to find your domain and the corresponding API key. There's no need to worry, just sign in to your Mailgun account end select the "Domain" navigation item:
This was the most basic implementation of the Mailgun API with a PHP wrapper. Let's see a more compound example code of PHP with attachments and other customization!
HTML and Image Attachment with PHP Mailgun API Wrapper
In the previous section, we uncovered how to use the sendMessage function with the key parameters. Now, we'll reveal a few more properties we could use.
Working at a company providing bulletproof HTML email templates with drag & drop editor, I always consider the support of HTML format as a primary objective in emailing. Luckily, the sendMessage function accepts HTML without any complication. Add an HTML email template file to your working folder, complete the PHP wrapper with these missing lines:
            # 1. Reading the contents of the HTML email template
            $htmlContent = file_get_contents("htmlContent.html");

            # 2. Reference the HTML content in the array of the
            #    sendMessage function's second parameter
                'html'    => $htmlContent
It may not bother you right now, but later you might want to add email attachments such as images or PDF documents as well. That can be done by adding a third parameter to the sendMessage function. This also has to be an array as the parameter before. As a result, you could reference multiple sources within that at the same time. The full example including the image attachments, HTML email template, seasoned with multiple recipients looks as follows:
        <?php
        # Include the Autoloader
        require 'vendor/autoload.php';
        use Mailgun\Mailgun;

        # Instantiate the client.
        $mgClient = new Mailgun('API-Key');
        $domain = "sandboxdomain.mailgun.org";

        # Reading the contents of the HTML email template
        $htmlContent = file_get_contents("htmlContent.html");

        # Make the call to the client.

        $result = $mgClient->sendMessage(
            $domain,
            array(
                'from'    =>
                    'Developer <developer@edmdesigner.com>',
                'to'      =>
                    'Friendly User <user@yourcompany.com>',
                'subject' =>
                    'Hello Friendly User',
                'text'    =>
                    'Testing some Mailgun awesomeness with PHP!',
                'cc'      =>
                    'Developer2 <developer2@edmdesigner.com>',
                'bcc'     =>
                    'Friendly User2 <user2@yourcompany.com>',

                'html'    => $htmlContent
            ),
            array(
                'attachment' =>
                    array('./logo2yellow.jpg','./logo2yellow.jpg'
            )
        ));

        ?>
You may also be interested in seeing the example of email HTML code as well:
<!DOCTYPE html>
<html xmlns="http://www.w3.org/1999/xhtml"  xmlns:v="urn:schemas-microsoft-com:vml">
  <head>
    <title>Sending Email with Mailgun API PHP Wrapper</title>
	<meta http-equiv="X-UA-Compatible" content="IE=edge" />
    <style>
      html,
      body,
      table,
      tbody,
      tr,
      td,
      div,
      p,
      ul,
      ol,
      li,
      h1,
      h2,
      h3,
      h4,
      h5,
      h6 {
        margin: 0;
        padding: 0;
      }

      body {
        margin: 0;
        padding: 0;
        font-size: 0;
        line-height: 0;
        -ms-text-size-adjust: 100%;
        -webkit-text-size-adjust: 100%;
      }

      table {
        border-spacing: 0;
        mso-table-lspace: 0pt;
        mso-table-rspace: 0pt;
      }

      table td {
        border-collapse: collapse;
      }

      .ExternalClass {
        width: 100%;
      }

      .ExternalClass,
      .ExternalClass p,
      .ExternalClass span,
      .ExternalClass font,
      .ExternalClass td,
      .ExternalClass div {
        line-height: 100%;
      }
      /* Outermost container in Outlook.com */

      .ReadMsgBody {
        width: 100%;
      }

      img {
        -ms-interpolation-mode: bicubic;
      }

      h1,
      h2,
      h3,
      h4,
      h5,
      h6 {
        font-family: Arial;
      }

      h1 {
        font-size: 28px;
		font-weight:normal;
        line-height: 32px;
        padding-top: 10px;
        padding-bottom: 24px;
      }


      h2 {
        font-size: 24px;
        line-height: 28px;
        padding-top: 10px;
        padding-bottom: 20px;
      }

      h3 {
        font-size: 20px;
        line-height: 24px;
        padding-top: 10px;
        padding-bottom: 16px;
      }

      h4 {
        font-size: 18px;
        line-height: 21px;
        padding-top: 10px;
        padding-bottom: 12px;
      }

      h5 {
        font-size: 16px;
        line-height: 21px;
        padding-top: 10px;
        padding-bottom: 8px;
      }

      h6 {
        font-size: 14px;
        line-height: 21px;
        padding-top: 10px;
        padding-bottom: 8px;
      }

      p {
        font-size: 16px;
        line-height: 20px;
        font-family: Georgia, Arial, sans-serif;
      }

      @media all and (max-width: 599px) {
        .container600 {
          width: 100%;
        }
      }
    </style>
  </head>
  <body style="background-color:#F4F4F4;">


    <table width="100%" cellpadding="0" cellspacing="0" style="min-width:100%;">
      <tr>
        <td width="100%" style="min-width:100%;background-color:#F4F4F4;padding:10px;">
          <center>
            <table class="container600" cellpadding="0" cellspacing="0" width="600" style="margin:0 auto;">
              <tr>
                <td width="100%" style="text-align:left;">
                  <table width="100%" cellpadding="0" cellspacing="0" style="min-width:100%;">
                    <tr>
                      <td width="100%" style="min-width:100%;background-color:#FFFFFF;color:#000000;padding:30px;">
                        <img alt="" src="https://edmdesigner.github.io/modern-html-email-tutorial/lesson08/img/logo.png" width="210" style="display: block;" />
                      </td>
                    </tr>
                  </table>
                  <table width="100%" cellpadding="0" cellspacing="0" style="min-width:100%;">
                    <tr>
                      <td width="100%" style="min-width:100%;background-color:#F8F7F0;color:#58585A;padding:30px;">
							<h1 style="font-family:Arial;font-size:36px;line-height:44px;padding-top:10px;padding-bottom:10px">Mailgun Test Email with PHP</h1>

							<p>This is some memorable HTML you could send with Mailgun in the blink of an eye.</p>
							<br>

							<h2>Note the attachments as well.</h2>
                      </td>
                    </tr>
                  </table>
                  <table width="100%" cellpadding="0" cellspacing="0" style="min-width:100%;">
                    <tr>
                      <td width="100%" style="min-width:100%;background-color:#58585A;color:#FFFFFF;padding:30px;">
                        <p style="font-size:16px;line-height:20px;font-family:Georgia,Arial,sans-serif;text-align:center;">2017 @ COPYRIGHT - EDMDESIGNER</p>
                      </td>
                    </tr>
                  </table>
                </td>
              </tr>
            </table>
          </center>
        </td>
      </tr>
    </table>
  </body>
</html>
The heavy use of tables in the HTML is the result of email design best practice.
There are many though spots in coding HTML emails.
And delivered to the inbox:
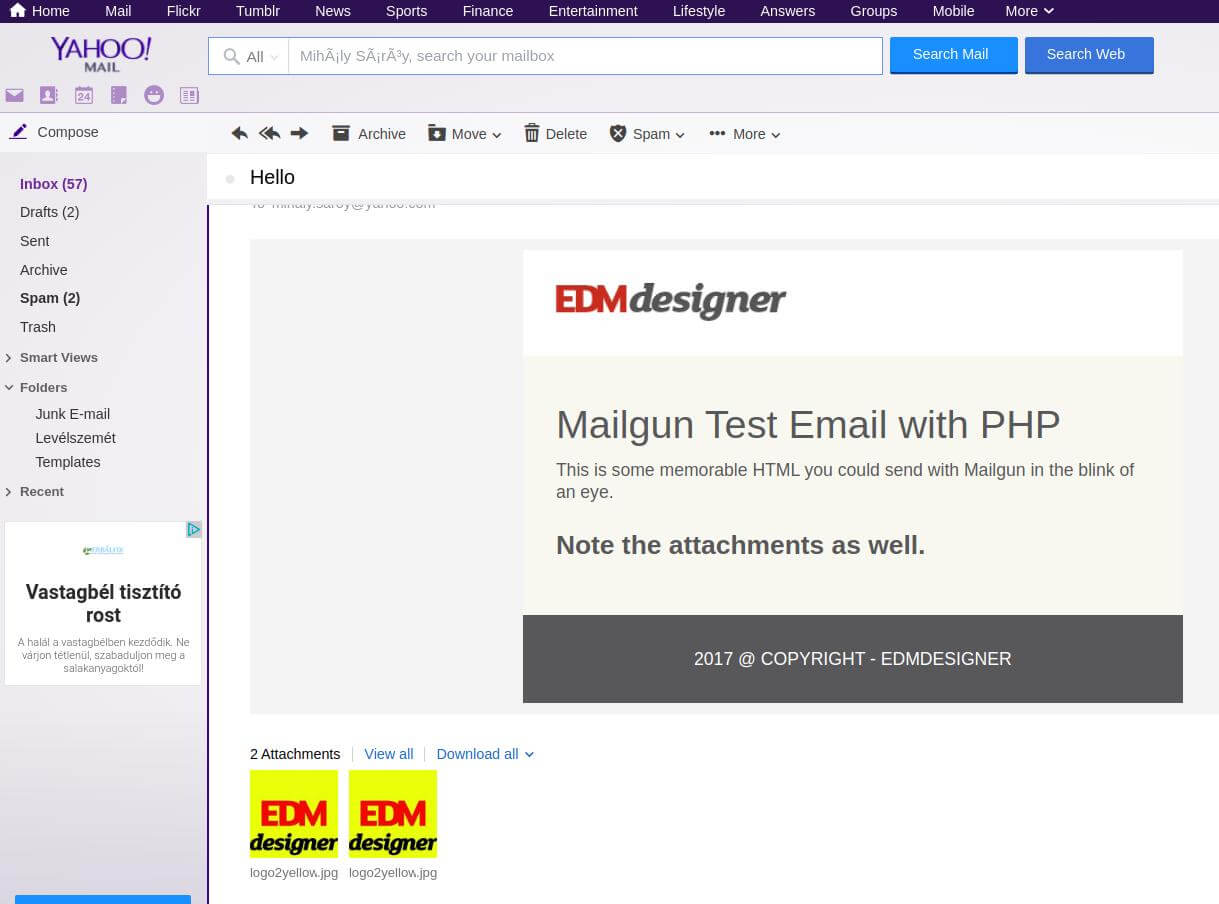
There are plenty of other parameters you could use. The full list is available following this link.
Sending Email Templates Using Sendgrid
While Mailgun was an easy to use mass email-sending service, Sendgrid is a little more compound, as it offers an HTML builder and several out-of-box integrations for popular CMS solutions. For this reason, it takes a little more time to find our ways around in the documentation, but otherwise, it's still easy to set up mailing with Sendgrid.
The process is very similar as before. You signup to obtain an API key, then use that key to leverage the API functionalities according to your needs. That's followed by the 3-step process of PHP wrapper creation: autoloader.php include, client instantiation and client calls.
This looks as follows with Sendgrid:
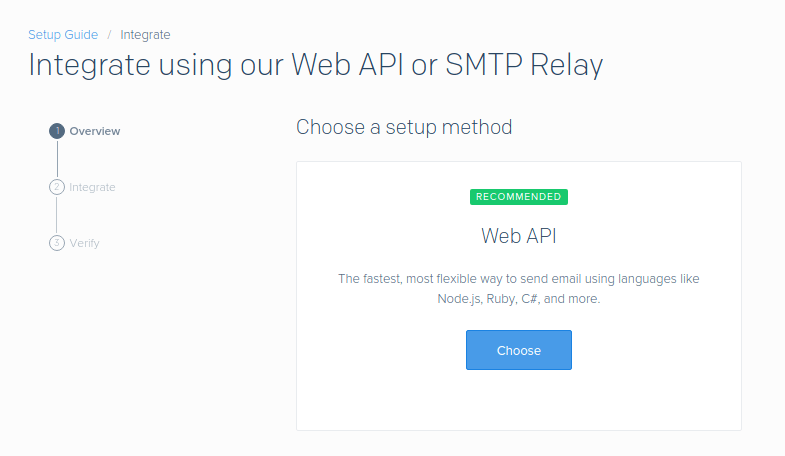
1, On first login you'll be directed to the setup guide. Select "Integrate using our Web API or SMTP relay" option by clicking "Start".
2, On the next page as recommended, select the Web API option and on the screen after that your desired programming language - make sure that it's PHP!
Let's look at the code that delivers our message:
    <?php
        require 'vendor/autoload.php';

        $from = new SendGrid\Email("Developer", "developer@edmdesigner.com");
        $subject = "Sending with SendGrid is Fun";
        $to = new SendGrid\Email("Friendly User", "user@yourcompany.com");
        $content = new SendGrid\Content("text/plain", "and easy to do anywhere, even with PHP");
        $mail = new SendGrid\Mail($from, $subject, $to, $content);

        $apiKey = getenv('SENDGRID_API_KEY');

        $sg = new \SendGrid($apiKey);

        $response = $sg->client->mail()->send()->post($mail);

        echo $response->statusCode();
        print_r($response->headers());
        echo $response->body();
    ?>
If you look at the example, you can spot that this time we want to access all information about the HTTP response from the API. That's very good for practice because you can debug failing delivery more easily. For example, if you omit a variable from the mail() method, the statusCode()'s return value 400 may not give you much help, but the request header and request body will tell a lot about the issue.
HTML and Image Attachment with PHP Sendgrid API Wrapper
Adding attachments requires the Sengrid $attachment object. There are five required parameters in the process: the arbitrary content Id, the base64 encoded image content, the file type, the include method and you can customize the file name. These are set with the call to the appropriate "setter" functions:
       // Setting the ID of the attachment
       $attachment = new SendGrid\Attachment();
       $attachment->setContentId("myId");
When you provided all 5 properties, you need to call the addAttachment method of the $mail helper class. As I mentioned before I always want to test if I can use HTML to my emails. Fortunately, it can be applied without any difficulty. We just need to provide it to the Content class:
        $htmlContent = file_get_contents("htmlContent.html");
        $content = new SendGrid\Content("text/html", $htmlContent);
The full example code looks as follows:
    <?php
        require 'vendor/autoload.php';

        //
        $from = new SendGrid\Email("Developer", "developer@edmdesigner.com");
        $subject = "Sending with SendGrid is Fun";
        $to = new SendGrid\Email("Friendly User", "user@yourcompany.com");
        $htmlContent = file_get_contents("htmlContent.html");
        $content = new SendGrid\Content("text/html", $htmlContent);

        $mail = new SendGrid\Mail($from, $subject, $to, $content);


        $file_encoded = base64_encode(file_get_contents($filePath));

        $attachment = new SendGrid\Attachment();
        $attachment->setContent($file_encoded);
        $attachment->setContentId("myId");
        $attachment->setType("image/jpg");
        $attachment->setDisposition("attachment");
        $attachment->setFilename("logo2yellow.jpg");

        $mail = new SendGrid\Mail($from, $subject, $to, $content);
        $mail->addAttachment($attachment);

        $apiKey = getenv('SENDGRID_API_KEY');

        $sg = new \SendGrid($apiKey);

        $response = $sg->client->mail()->send()->post($mail);

        echo $response->statusCode();
        print_r($response->headers());
        echo $response->body();
    ?>
I hope the steps were easy to follow. If you have any questions don't hesitate to ask them in the comment section, below the article.
Sending Email Templates Using Amazon SES
Our last candidate is a product of the biggest cloud infrastructure provider in the world. Amazon SES stands for Amazon Simple Email Service. It's a cloud-hosted email delivery platform with a pay-per-use price-model. This makes it a scalable and affordable service for multiple uses. As with other Amazon services, there's a free tier provided for developers' testing purposes. We'll take advantage of that right now!
Sending Email Templates Using the AWS SDK
An Amazon registration is slightly different from the previously showcased email APIs, as you must provide credit card information and billing address as part of the sign-up process.
After registration there's an additional step you need to complete to be able to send test emails: you need to verify the email addresses you'll use for sending and receiving. Otherwise, you'll receive such errors:
      The email was not sent. Error message:
      Email address is not verified. The following
      identities failed the check in region US-WEST-2:
      <the address you used in your code>
You can do this verification on the Amazon SES dashboard. That's a minor added complication compared to Mailgun or Sendgrid.
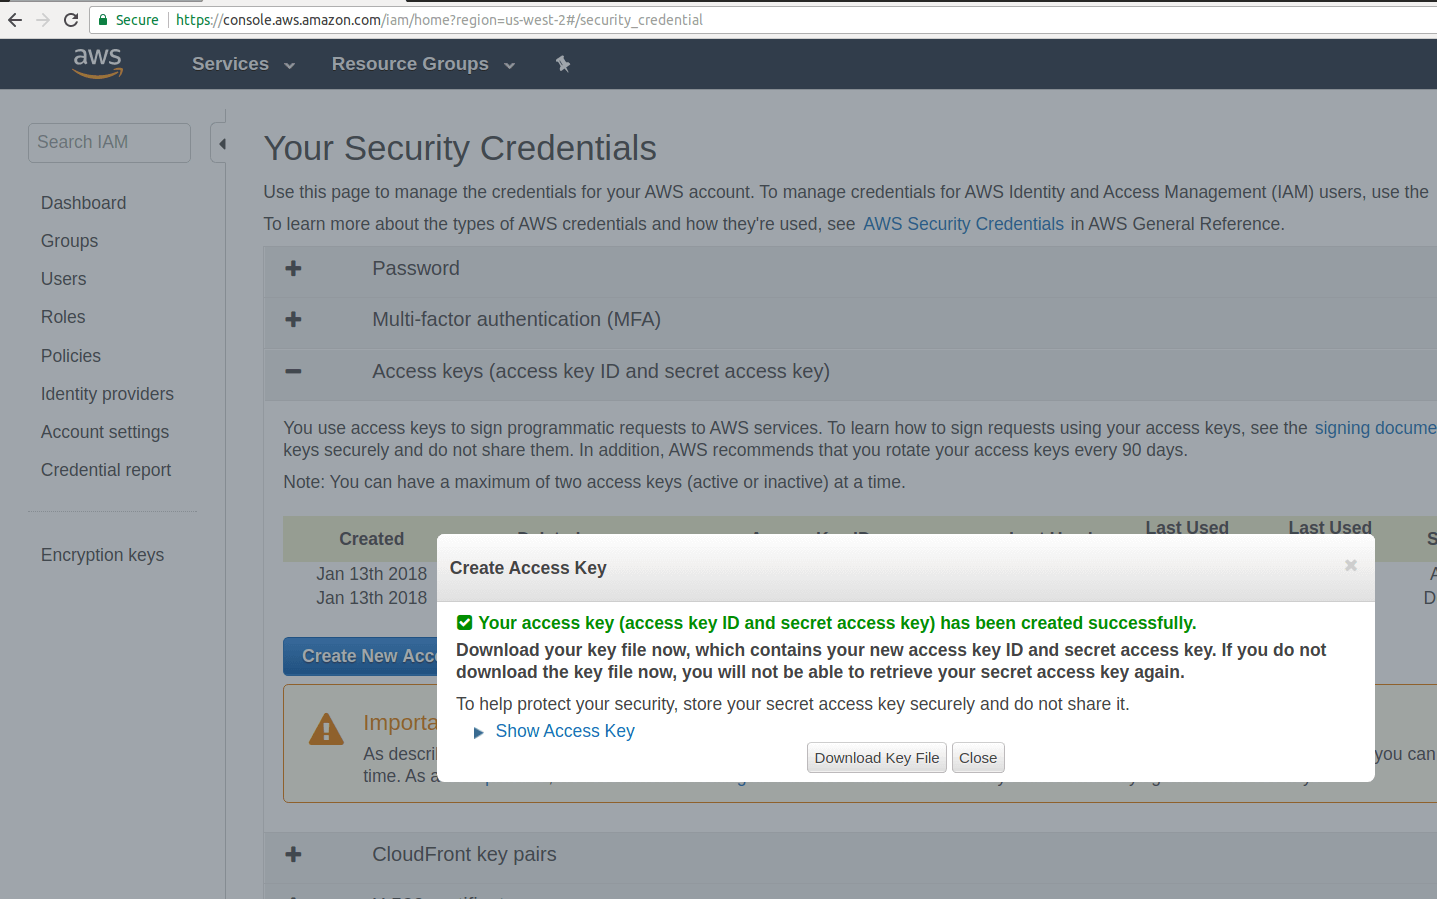
To obtain the API key and corresponding API secret follow these steps in the dashboard:
- Click Your name in the navigation drop-down
- Select "My security credentials" option
- Click "Continue to Security Credentials" in the pop-up modal
- From the accordion menus select "Access Keys"
- Hit "Create New Access Key"
- Then either click "Show Access Key" to activate the drop-down or "Download Key File" (that's better if you include it with environment variables)
Next, you'll need the following code:
    <?php

        // Replace path_to_sdk_inclusion with the path to the SDK as described in
        define('REQUIRED_FILE','vendor/autoload.php');
        require REQUIRED_FILE;

        use Aws\Ses\SesClient;
        use Aws\Ses\Exception\SesException;

        // Require previously created HTML email template and other content items
        define('HTMLBODY', file_get_contents('htmlContent.html'));
        define('TEXTBODY', "<include the text version of the email template>");
        define('SUBJECT','Amazon SES test (AWS SDK for PHP)');

        // Replace sender@example.com with your "From" address.
        // This address must be verified with Amazon SES.
        define('SENDER', 'developer@edmdesigner.com');

        // Replace recipient@example.com with a "To" address. If your account
        // is still in the sandbox, this address must be verified.
        define('RECIPIENT', 'friendly.user@company.com');

        // Include the AWS Region you're using for Amazon SES.
        define('REGION','us-west-2');

        define('CHARSET','UTF-8');

        // Instantiate SesClient class
        $client = SesClient::factory(array(
            'version'=> 'latest',
            'region' => REGION
        ));

        // Send email with the defined named constants
        try {
            $result = $client->sendEmail([
            'Destination' => [
                'ToAddresses' => [
                    RECIPIENT,
                ],
            ],
            'Message' => [
                'Body' => [
                    'Html' => [
                        'Charset' => CHARSET,
                        'Data' => HTMLBODY,
                    ],
                    'Text' => [
                        'Charset' => CHARSET,
                        'Data' => TEXTBODY,
                    ],
                ],
                'Subject' => [
                    'Charset' => CHARSET,
                    'Data' => SUBJECT,
                ],
            ],
            'Source' => SENDER
        ]);

            $messageId = $result->get('MessageId');
            echo("Email sent! Message ID: $messageId"."\n");

        } catch (SesException $error) {
            echo("The email was not sent. Error message: "
                .
            $error->getAwsErrorMessage()."\n");
        }

    ?>
Let's see step-by-step what this piece of code contains:
- First you require the Autoloader to be able to access the AWS SDK classes. We'll need the
SesClientandSesExceptionclasses, so we refer them to the use operator - Next, provide the variables for the
sendEmailfunction with named variables using the define method - Last we instantiate the SesClient class into a
$clientvariable and in a "try-catch block" we call thesendEmailfunction of SesClient and print a success message or the error based on the delivery result
I bet you feel excited now. You head to the console to run the script: php <yourfile>.php and you receive: Error message: Email address is not verified. That's what I mentioned previously. Without verified addresses, you can't deliver emails, not even in sandbox mode. So, let's fix it.
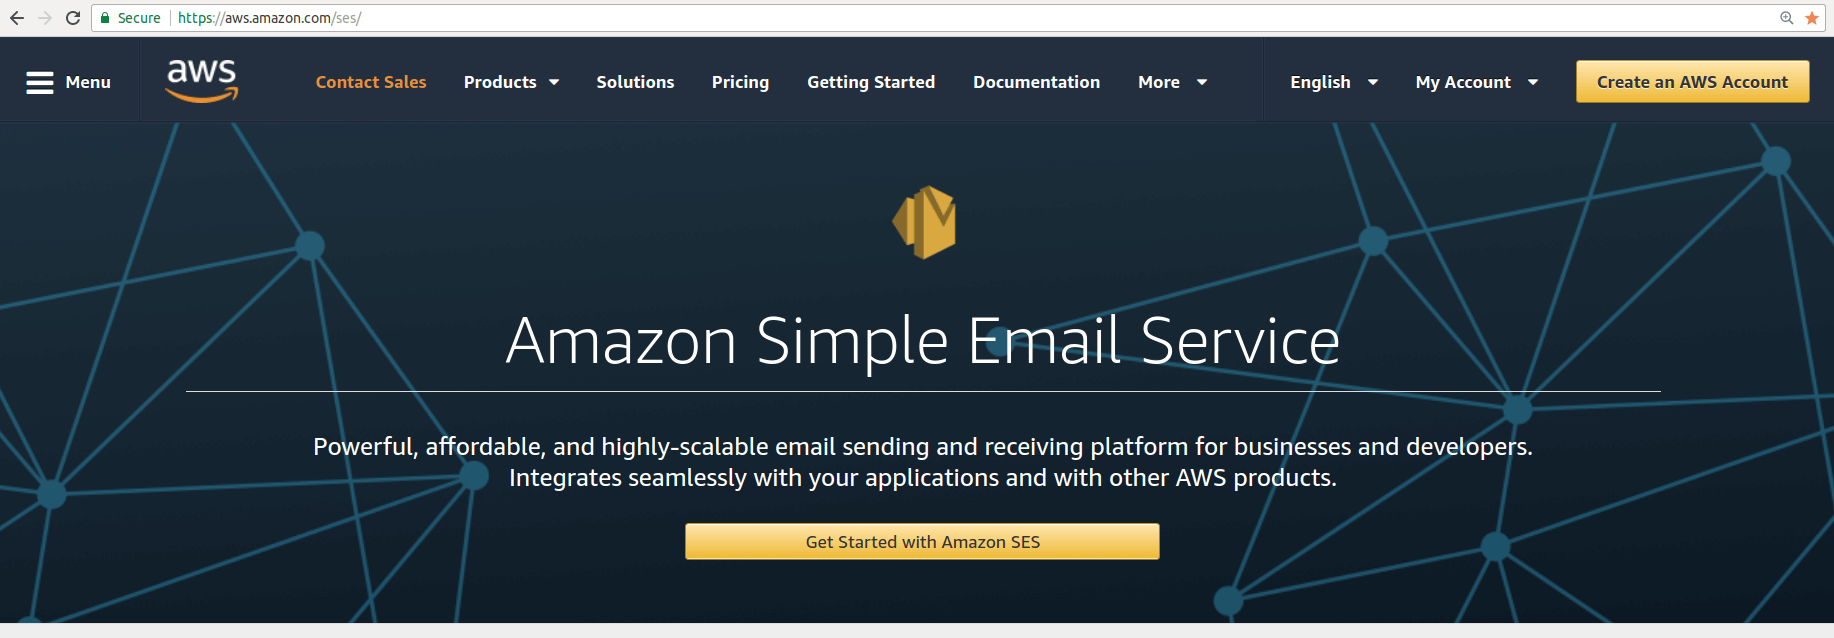
Navigate to the Amazos SES dashboard:
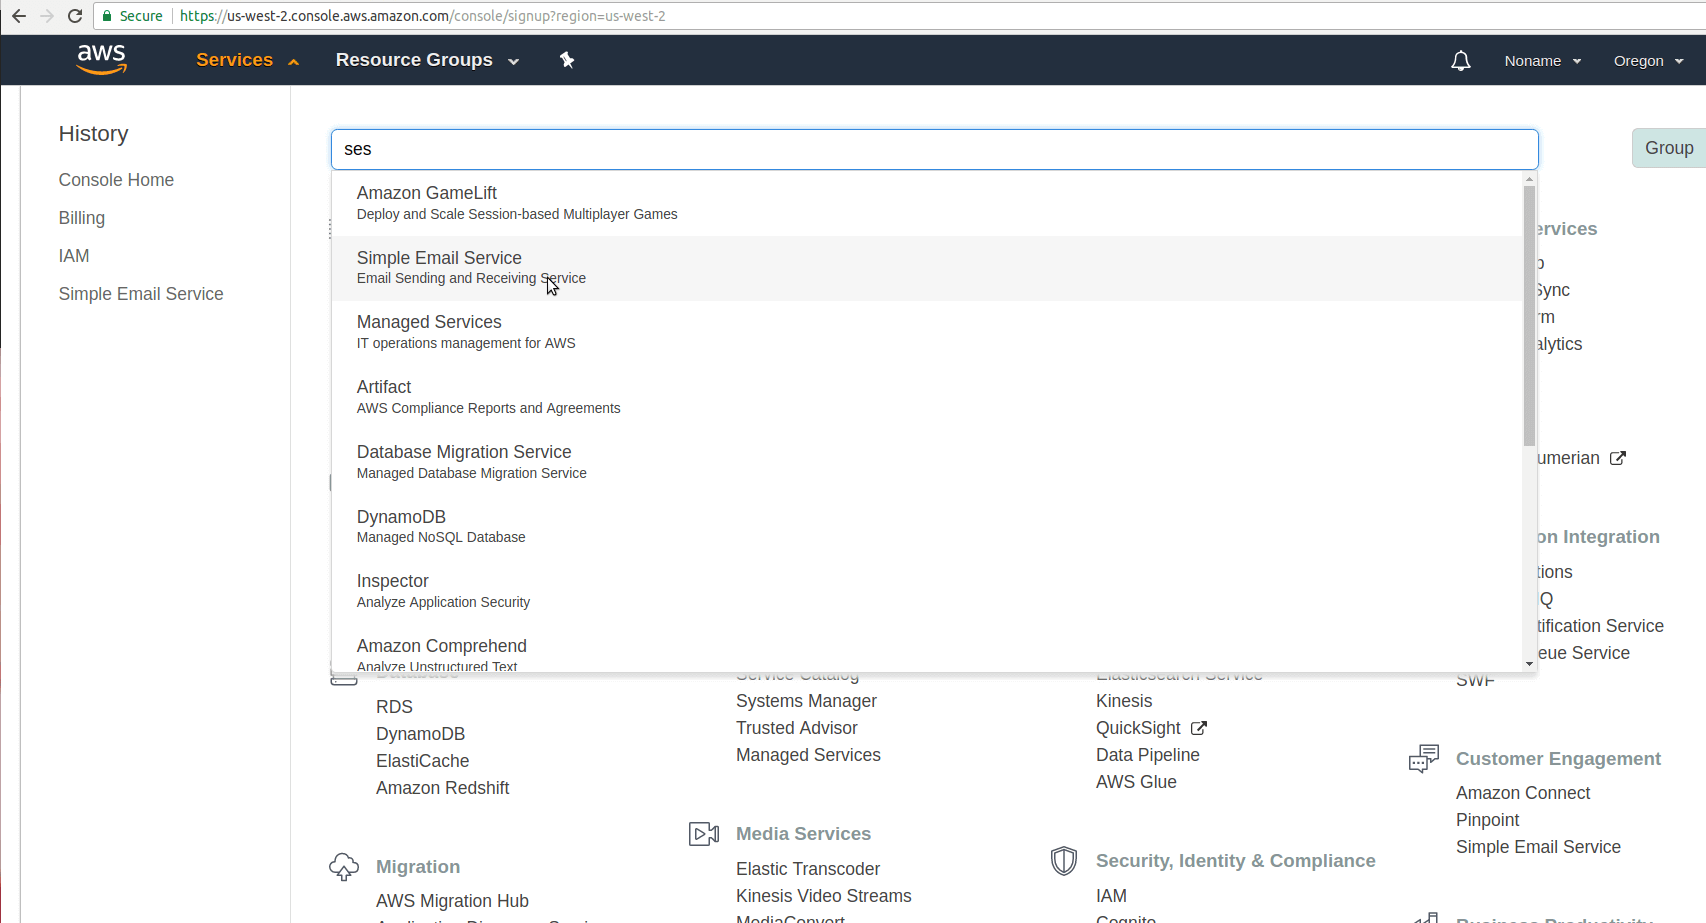
and once it loaded go to "Email Addresses" under "Identity Management". You can add the email addresses you want to use there. When you retry you'll receive a success message and as the retrieval of the MessageId was set in the code, you'll also receive this Id that you can use to track your message delivery in the dashboard.
      Email sent! Message ID:
      01010160fe95d93d-b7bc4b30-ebdf-4380-b2cf-b21771....
That's it! You sent your first email using Amazon SES and PHP. If you didn't receive it, this guide can cast light on what could have gone wrong.
In the next section, I'll show you how to use some features of the API.
https://docs.aws.amazon.com/ses/latest/DeveloperGuide/create-shared-credentials-file.html
Amazon SES API For Sending HTML Email Templates
We've seen how to send an HTML email template using Amazon SES with the file given at a certain location in your file-system. If you implement the PHP wrapper on a server that's all well and good or if you send it from your local machine. But wouldn't it be better if you could use templates stored in your Amazon SES account?
It certainly makes sense, and as it's just a few additional lines of code, I'll show you how to do it programmatically. You can fully re-use the code from the previous section.
We are going to use the necessary fields and methods of the Amazon SES API. Learning about these will enable you to create more complex code examples.
The first thing to do is to create a configuration set. On the client let's call the createConfigurationSet method as follows:
        $client->createConfigurationSet([
            'ConfigurationSet' => [ // REQUIRED
                'Name' => 'FirstSet', // REQUIRED
            ],
        ]);
Creating a template works similarly, we just switch the method and the supplied parameters:
        $client->createTemplate([
            'Template' => [ // REQUIRED
            'HtmlPart' => $htmlContent,
            'SubjectPart' => 'Subject of first awesomeness',
            'TemplateName' => 'Templating-101', // REQUIRED
            'TextPart' => 'This is just text']
        ]);
As you can see above, I supplement the HTML for the template as before by assigning the variable containing the HTML to the corresponding property.
If you insert these two pieces of code into the previously shown PHP wrapper and run the script, your AWS SES account will be enriched with your brand new template:
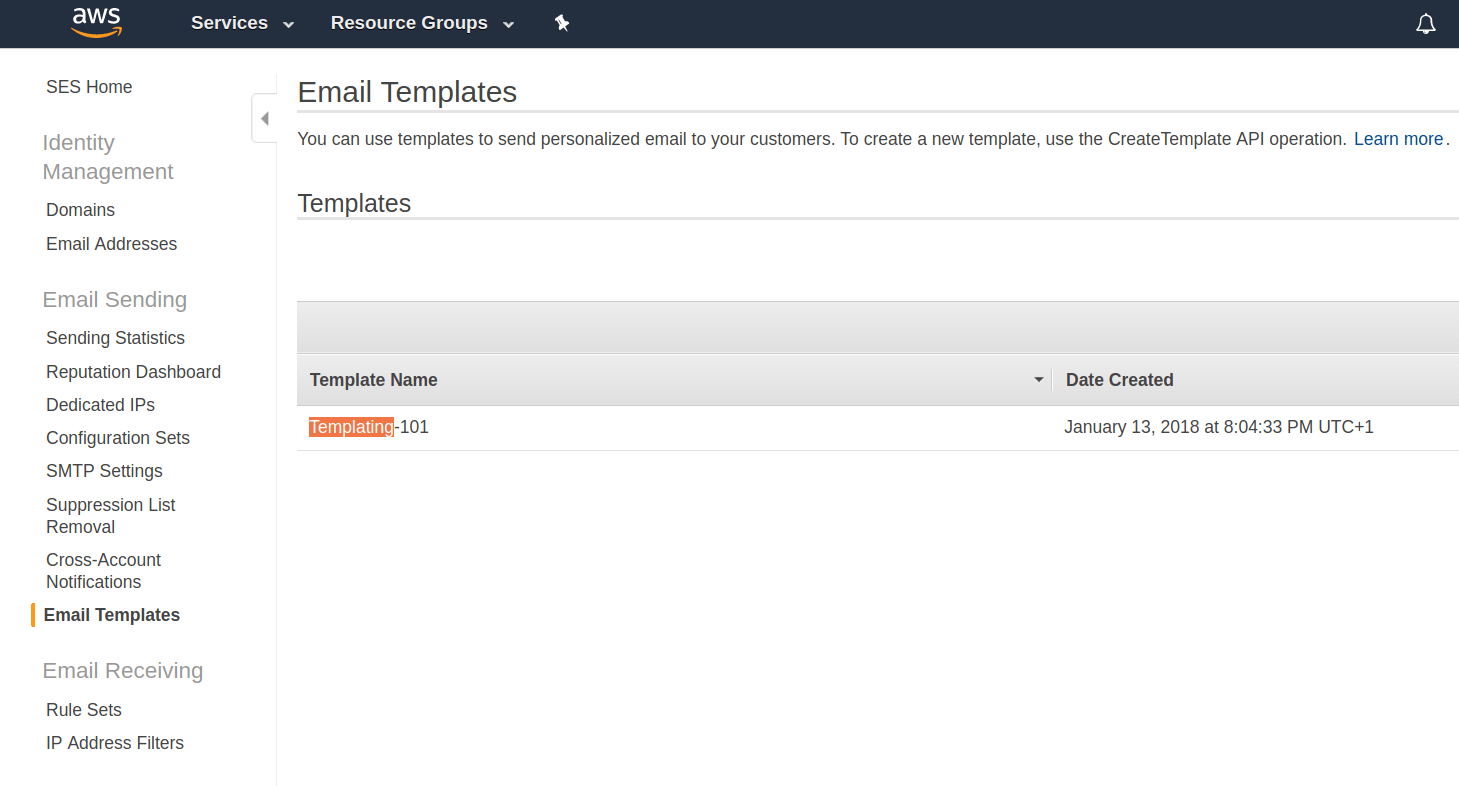
As the next step, we need to move these bits of code into a separate file or comment it out, as we don't want to make duplicates of the configuration settings and the template (actually we can't with the same names): The email was not sent. Error message: Configuration set <FirstSet> already exists.
So the template is created, unnecessary code taken out, we just need to reference the created template:
    $result = $client->sendTemplatedEmail([
        'ConfigurationSetName' => 'FirstSet',
        'Destination' => [ // REQUIRED
            'ToAddresses' => ['friendlyUser1@company.com',
             'friendlyUser2@company.com']
        ],
        'Source' => 'developer@edmdesinger.com', // REQUIRED
        'Tags' => [
            [
                'Name' => 'Name', // REQUIRED
                'Value' => 'Value', // REQUIRED
            ],
        ],
        'Template' => 'Templating-101', // REQUIRED
        'TemplateData' => 'jsonValues for template', // REQUIRED
    ]);
If you included it correctly, your message will be delivered to the recipients without any problems. Note, that sendEmail method is replaced bysendTemplatedEmail to allow the use of the template from the Amazon account. Once you're done testing and ready to move to production, you can request a sending limit increase and move your account out of the limited sandbox environment.
If you're really serious about getting to know Amazon SES check out the video tutorials and the documentation.
Summary
There are an endless number of services for bulk sending emails using PHP. We saw the most well-known ones Mailgun, Sendgrid and Amazon SES.
We gained hands-on experience in their basic setup and explored some commonly used features to learn about their API. We saw how to attach an image file to the email through the examples of Mailgun and Sendgrid APIs and looked at how to provide previously built HTML email templates within the message body. Last but not least, we tried the programmatic process of creating and referencing email templates with Amazon SES API.
I hope you could learn the basics and feel confident enough to give email APIs a try. If you have additional resources or code examples that fellow coders could make use of or inspiring thoughts about email APIs, please share them in the comment section below.
If you liked this article, you may like the others to come. Subscribe to our newsletter to get them delivered to your inbox.